Macrium Reflect Demonstration
Premise:
Dell computer with factory partitions (Utility and Recovery) at the front of the hard disk,
followed by the OS primary partition and a logical partition for data.
The goal is to eliminate the two extraneous partitions and add the space to the OS partition.
In this demonstration, a Macrium Reflect backup image of the OS partition has already been made.
If an image has not been made, that should be done first.
(Click any image for full-size screenshot.)

Step 1:
Boot from your Macrium Reflect Rescue media (CD or USB stick).
Click the Restore tab, then click the link to browse for your backup image.
Navigate to your backup image and select it.

Step 2:
Once selected, the lower part of the right pane will list your image.
To proceed, click the "Restore Image" link.

Step 3:
In the pop-up dialog window, the upper graphic will show a representation of what is in your image.
In this demonstration, Macrium knows the original source had four partitions but only the third partition was imaged.
The lower graphic shows the partitions on your existing hard disk.
In this demonstration, no partitions have been deleted yet, but the plan is to delete the first three partitions
and replace them from the image previously made of the third partition.
Click the first partition. A blue underline will indicate the selected partition. Then click "Delete Existing partition".
Repeat the process to delete the second and third partitions.

Step 4:
You will now have empty, unallocated space where the first three partitions used to be.
Drag-and-drop the partition from the upper (image) to lower (disk).

Step 5:
The lower graphic will now show the space the partition restore will occupy.
Since the available space that was freed up is more than the partition being restored, there will be additional unallocated space leftover.
We want to expand the restored partition to use that space, so click the "Restored Partition Properties" link.

Step 6:
In the pop-up dialog, use your mouse to grab the dotted line at the right end of the partition, and slide it all the way to the right to take up the unallocated space.
IMPORTANT: In the "Alignment" box, make sure you select "Vista/7/SSD" so Macrium properly aligns the partition when it is restored.

Step 7:
Up to this point, nothing has actually been done to your hard disk yet. You have merely queued up the operations you want Macrium to perform: delete three partitions, restore one from your backup image, properly aligning it, and resize it to fill all available space.
Click the "Next" button if you want Macrium to start modifying your hard disk.

Step 8:
Click "Finish" and "Continue" on the next two screens.
Note that Macrium will remind you the first three partitions will be overwritten.
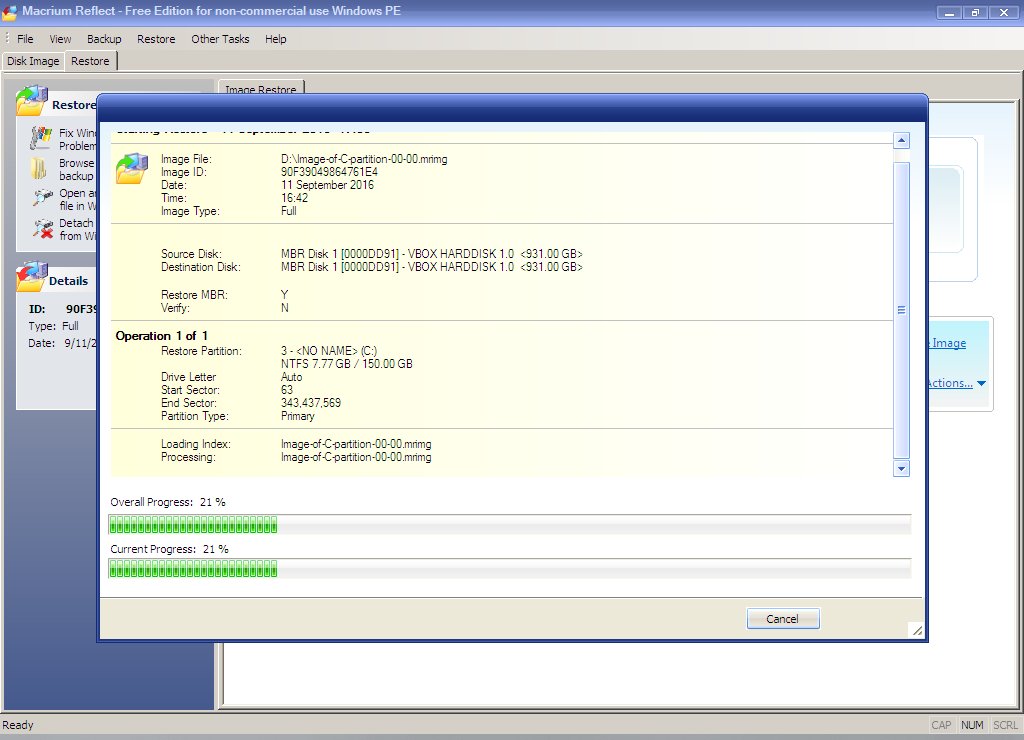
Step 9:
Let the process continue to completion.

Step 10:
When the restore process has finished, you should be able to click the "Disk Image" tab and see that your first three partitions have now been replaced by one.
However, the boot configuration still needs to be repaired before the restored partition will boot properly.

Step 11:
Click the "Restore" tab, then click "Fix Windows Boot problems".
WARNING: To avoid errors, it is advisable to first disconnect any additional hard disks so the boot/system disk is the only one connected.

Step 12:
If you took precautions in the previous step, there should only be one disk listed here.
Click "Next" to continue.

Step 13:
Possible primary partitions will be listed here. We replaced three primary partitions with one.
In this demonstration the fourth partition is an extended/logical partition for data, so isn't listed here because it isn't a primary.
Put a tick mark to select the partition, then click "Next".
Note: If you've configured your partitions differently and have more than one primary, make sure you select the correct OS partition you want the system to boot.

Step 14:
In the "Boot Code Options" window, leave all four options ticked, then click "Finish".

Step 15:
Macrium will configure the system so Windows will boot.
When finished, remove the Macrium CD or USB stick and reboot the computer.

Back to Top
last revised: 09/11/2016

