Add the Printer to Windows
Once you know the IP address the print server is using, you're ready to add the
printer to Windows. This involves two separate procedures: add the TCP/IP printer
port to Windows, and add the printer, telling it to use that port.
The following screenshots illustrate how to add the TCP/IP port and printer to a Windows XP computer. The same procedure should work for any NT-based operating system. Windows 98 and earlier operating systems do not support the addition of TCP/IP ports like this. With those very old operating systems, you will likely have to resort to installing the manufacturer's software ... if it even exists for that operating system.
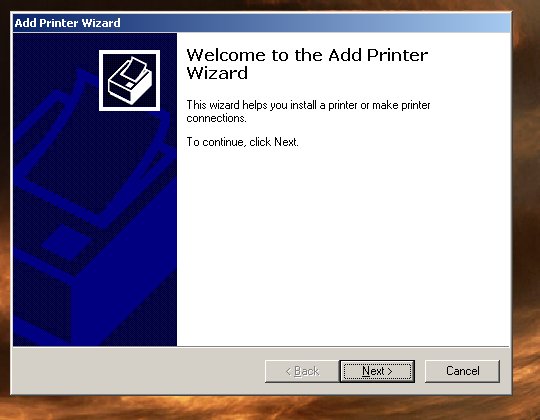
Screen 1: Start the Wizard
Open your "Printers and Faxes" folder and click the "Add a printer" task.
This will start the Add Printer wizard.
Click [Next].

Screen 2:
The process starts right out with a common source of confusion.
Although the printer is connected to the network, we are going to create
a new local port and add the printer to that port.
Choose the option to add a "Local printer attached to this computer."
Make sure you do not check the "Automatically detect..." checkbox. (We do not want Windows to get hung up searching for a plug-and-play printer on a port we haven't created yet.)
Click [Next].

Screen 3:
On the next screen, select "Create a new port."
In the drop-down box, choose "Standard TCP/IP Port."
Click [Next].
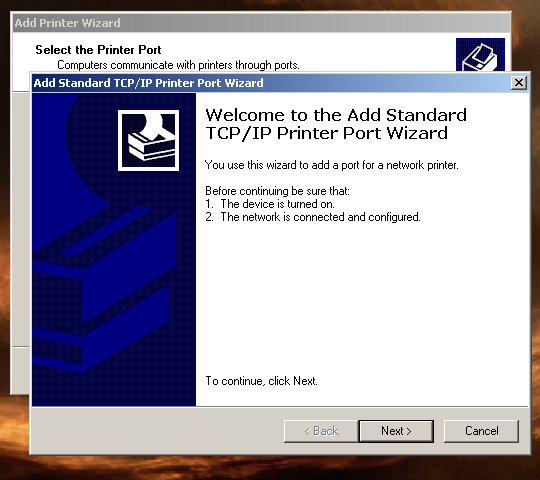
Screen 4: Create the TCP/IP Port
The TCP/IP Port wizard starts.
Click [Next].
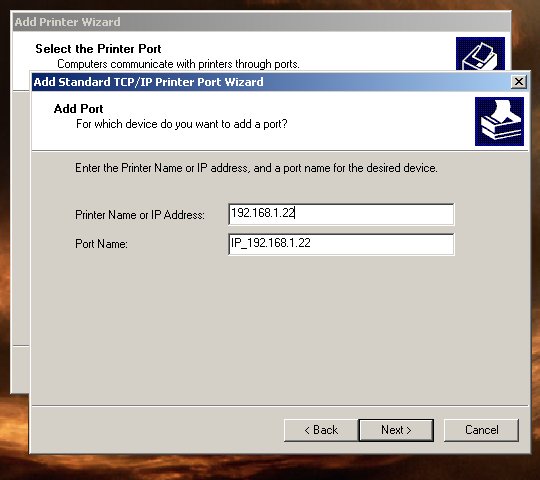
Screen 5:
Enter the print server's IP address.
The wizard will automatically suggest a port name. You can use the default name or give the port any name you want. Examples of names that might be more descriptive are "DLINK_3", "UPSTAIRS", or "LJ2200", for instance. If you move printers (or print servers) around, though, you might want to just leave the name as the IP address.
Click [Next].

Screen 6:
Select the "Standard" device type.
In the drop-down box, select "Generic Network Card."
Click [Next].
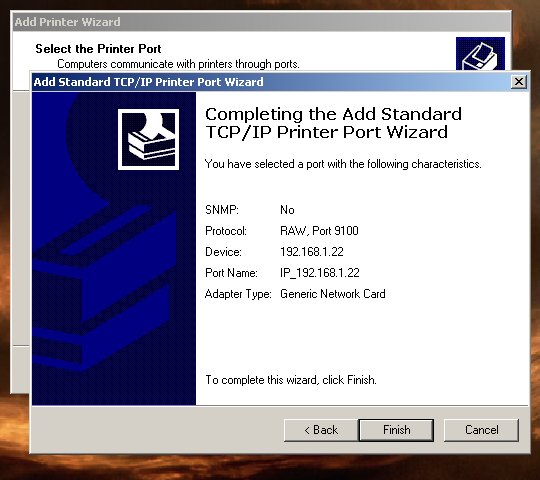
Screen 7:
Click [Finish].
The TCP/IP port will be added to the list of available printer ports.

Screen 8: Add the Printer
If Windows has a built-in driver for your printer, select the manufacturer
and model from the list, then click [Next].
If the printer is not listed in the Windows list, or if you have a driver disk you will be using to load an updated driver, click the [Have Disk] button and browse to the location of your driver.
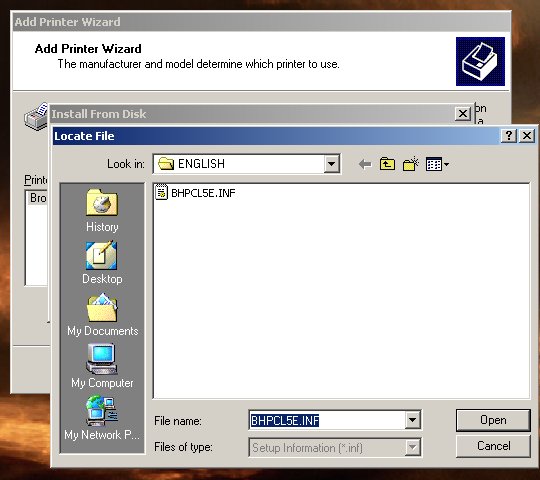
Screen 9:
If you are installing a driver from a disk, click the [Browse] button
and navigate to the location of the printer driver's INF file.
In this example, we navigated through the nested folders on the manufacturer's CD to the \driver\generic\Win2K_XP\ENGLISH folder, and the wizard found a INF file.
Click [Open].
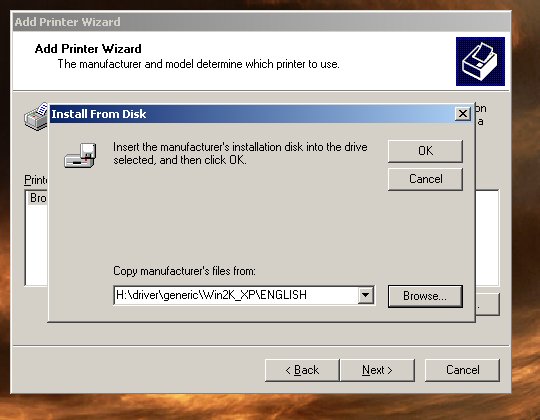
Screen 10:
Click [OK].
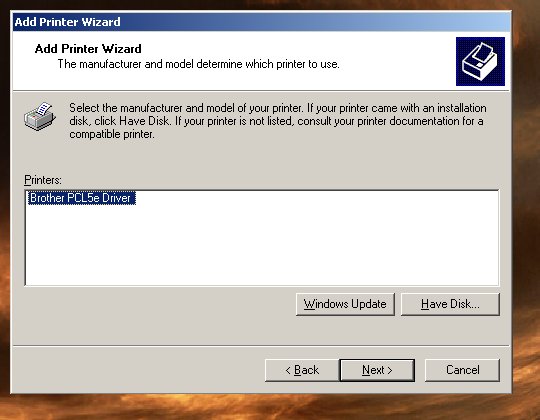
Screen 11:
The wizard lists the names of the printer(s) that have drivers at
this location.
Select the correct printer (in this example there is only one).
Click [Next].
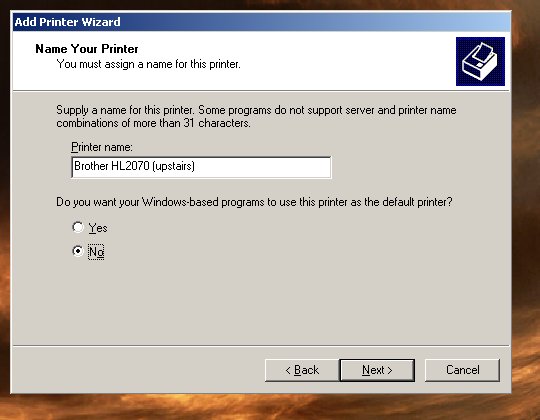
Screen 12:
Give the printer a descriptive name so you can easily differentiate it
from other printers you have installed.
Click [Next].
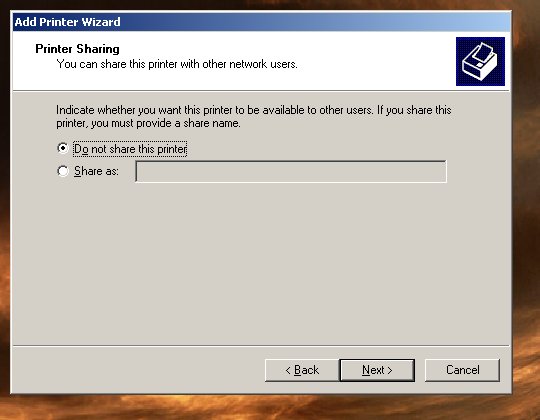
Screen 13:
Select "Do not share this printer."
There are a few exceptions, but normally, other computers will connect to the printer on their own, not through this computer.
Click [Next].
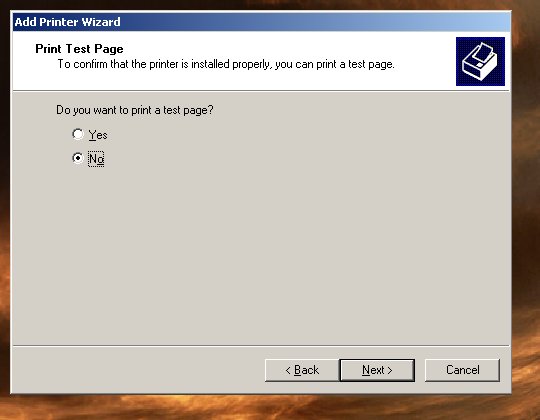
Screen 14:
Select whether or not you want to immediately print a test page.
Click [Next].
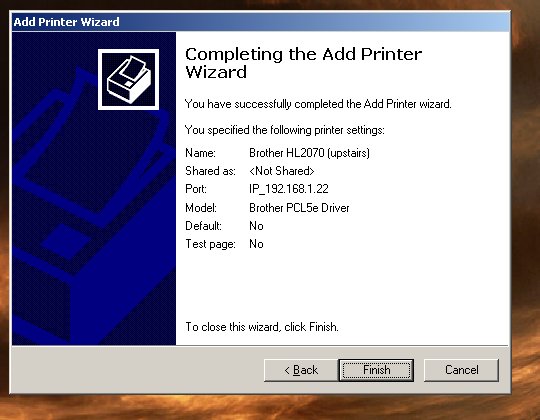
Screen 15:
Click [Finish].
Finished
The printer and TCP/IP port have been added, and the printer has been set
to use the TCP/IP port.
Caveats
Note that in the above example the TCP/IP port was created as part of the
"Add Printer" wizard. However, they are really two separate steps and
can be completed separately.
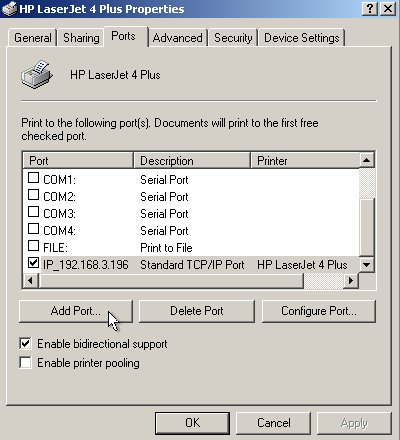 The screenshot at right shows the familiar Properties page of a printer.
Under the [Ports] tab there is a button to "Add Port". This starts the
same wizard as in Screen 4 above, where a new TCP/IP port can be created.
The screenshot at right shows the familiar Properties page of a printer.
Under the [Ports] tab there is a button to "Add Port". This starts the
same wizard as in Screen 4 above, where a new TCP/IP port can be created.
In this particular example, a Laserjet printer originally installed on LPT1 was being moved to another room and connected to a print server. Instead of going through the complete "Add Printer" wizard, the TCP/IP port was added from the Properties page, then the printer was changed to use the TCP/IP port instead of LPT1.
If your printer is an older model, Windows may already have a built-in driver. In that case, you can select the Windows driver from the list in Screen 8.
If you are installing the driver from a disk (either on CD or downloaded to your hard disk from the manufacturer's website), the driver will need to be readily accessible for the steps in Screens 9-11. Some manufacturers or models--notably, inkjet photo printers--many not provide drivers in readily accessible format. Instead, drivers are embedded in an executable file and you must run the manufacturer's "setup" program to extract the drivers. Unfortunately, this may load all sorts of extra junk programs, too.
last revised: 08/25/2007
